Does anyone have design plans for a sand Autoloader?
I have read the 2015 thread viewtopic.php?f=189&t=6070 that says look at these pictures and you'll be able to figure it out. I was really hoping for some plans, especially for the sand chute and flap. I am aware of C&B Hoppers http://www.cbhoppers.com/ that sell an already built one. But that looks so heavy. We want to buy this together with our middle school and share it and transport it back and forth. The one I would really love plans for is the North Carolina one made out of PVC http://www.sciencenc.com/event-help/eve ... e_page.php (5th picture down)
Autoloader Plans?
-
Unome

- Moderator

- Posts: 4414
- Joined: January 26th, 2014, 12:48 pm
- Division: Grad
- State: GA
- Has thanked: 302 times
- Been thanked: 120 times
Re: Autoloader Plans?
I would recommend a metal frame and a wooden test base. An upside-down water container with the base cut off (to pour the sand into), and a PVC pipe firmly attached to the opening (which points downward, but ideally you would want a curved connector to point the flow down and forward) should work, with the container resting in a circular hole in the test base, behind the 20x20 hole used for the tower. I'd recommend attaching a metal handle to the handle of one of those PVC valves and using that to control the flow (perhaps having the handle of teh valve on the side, so that the attached handle can be operated from a standing position?)
All of this is based on what I remember of our autoloader, which was built a few years ago by people on our team; it's held up well over the years, and as long as the valve doesn't get clogged it works perfectly.
All of this is based on what I remember of our autoloader, which was built a few years ago by people on our team; it's held up well over the years, and as long as the valve doesn't get clogged it works perfectly.
-
meierfra
- Coach

- Posts: 76
- Joined: August 23rd, 2016, 10:01 am
- Division: C
- State: MI
- Has thanked: 3 times
- Been thanked: 11 times
Re: Autoloader Plans?
Do you think it requires a metal frame? Do you think the PVC frame would be too unsteady? We're trying to go for portability, but without loss of function.Unome wrote:I would recommend a metal frame and a wooden test base. An upside-down water container with the base cut off (to pour the sand into), and a PVC pipe firmly attached to the opening (which points downward, but ideally you would want a curved connector to point the flow down and forward) should work, with the container resting in a circular hole in the test base, behind the 20x20 hole used for the tower. I'd recommend attaching a metal handle to the handle of one of those PVC valves and using that to control the flow (perhaps having the handle of teh valve on the side, so that the attached handle can be operated from a standing position?)
All of this is based on what I remember of our autoloader, which was built a few years ago by people on our team; it's held up well over the years, and as long as the valve doesn't get clogged it works perfectly.
I like the PVC valve idea, I haven't seen that, but tell me what you mean by "as long as the valve doesn't get clogged"? How often did that happen to you? Is there anything that caused it or anything one can do to prevent it?
-
Tesel
- Exalted Member

- Posts: 161
- Joined: January 30th, 2016, 8:03 pm
- Division: C
- State: MI
- Has thanked: 0
- Been thanked: 1 time
Re: Autoloader Plans?
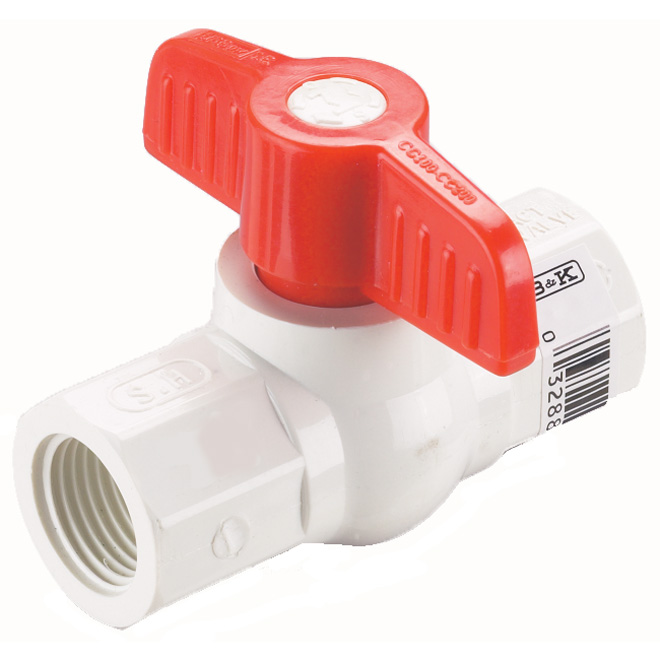
I think some people use a different type of valve so that it's impossible to get clogged... trying to remember what it's called, maybe a knife valve or a gate valve?
University of Michigan Science Olympiad Div. C Event Lead
2018 MI Mission Possible State Champions
2018 MI Mission Possible State Champions
-
Unome
- Moderator
- Posts: 4414
- Joined: January 26th, 2014, 12:48 pm
- Division: Grad
- State: GA
- Has thanked: 302 times
- Been thanked: 120 times
Re: Autoloader Plans?
Yeah I believe it's a knife valve; I've heard that referenced a few times before.Tesel wrote:I think some people use a different type of valve so that it's impossible to get clogged... trying to remember what it's called, maybe a knife valve or a gate valve?
It only got clogged once in the last few years (I think it was a metal bolt or something, can't remember) but it was at a rather inopportune time.meierfra wrote:Do you think it requires a metal frame? Do you think the PVC frame would be too unsteady? We're trying to go for portability, but without loss of function.Unome wrote:I would recommend a metal frame and a wooden test base. An upside-down water container with the base cut off (to pour the sand into), and a PVC pipe firmly attached to the opening (which points downward, but ideally you would want a curved connector to point the flow down and forward) should work, with the container resting in a circular hole in the test base, behind the 20x20 hole used for the tower. I'd recommend attaching a metal handle to the handle of one of those PVC valves and using that to control the flow (perhaps having the handle of teh valve on the side, so that the attached handle can be operated from a standing position?)
All of this is based on what I remember of our autoloader, which was built a few years ago by people on our team; it's held up well over the years, and as long as the valve doesn't get clogged it works perfectly.
I like the PVC valve idea, I haven't seen that, but tell me what you mean by "as long as the valve doesn't get clogged"? How often did that happen to you? Is there anything that caused it or anything one can do to prevent it?
-
dholdgreve
- Coach
- Posts: 573
- Joined: February 6th, 2006, 2:20 pm
- Division: B
- Has thanked: 0
- Been thanked: 7 times
Re: Autoloader Plans?
I've built probably a dozen of these for various teams, and off the following thoughts:
1) A knife valve approach works better than a ball valve or flapper valve, as it will not get jammed by the sand, or splatter sand all over the venue when closing. Care should be taken when using a spring loaded knife valve to position it at least a finger and a half from the end of the chute to avoid any amputations from the guillotine action of the knife... no joke! Due to the mechanical advantage of the class 1 lever, it will chop a 3/8" dowel in half very cleanly!
2) Slot the PVC tube half way through, then use a piece of metallic ductwork cut in a half round shape that drops into the cut, closing off the sand. Extend the metal up high enough to wrap the top edge of a 3/4" x 3/4" piece of wood that acts as a class 2 lever in closing the blade
3) Connect the distal end of the class 2 lever to a class 1 lever with an archery release. Connect a cord from the trigger of the archery release(using JB weld) to a remote location for the supervisor to pull when a structure breaks, thus avoiding the need to remove any sand... ever.
4) attach a spring to the distal end of the class 3 lever that will snap the knife shut when released from the class one lever. The class one lever attaches to the distal end of the class 2 lever at one end, and functions as a handle that operates the flow of sand at the other, with the fulcrum mounted to the frame of the hopper somewhere in the middle.
5) Use an inverted plastic 5 gallon water bottle as the hopper, with the bottom cut out. I have yet to find a hopper that has enough slope built into it to freely flow all sand down the chute, so I have always increased the pitch of the bottom, by installing a plastic funnel drilled and bolted to the perimeter of the inside of the hopper, dropping down into the outlet.
6) Use a rubber 45 degree elbow with worm clamps at both ends to connect the outlet of the hopper bottle to the PVC chute pipe
7) Use a medium to course sand blasting sand. It will be course enough to not slip past any irregularities of the knife and have virtually no dust in it that would blow up in the kids faces.
8) Do not connect the hopper apparatus to the testing table. Especially in the case of towers, the testing table MUST be dead level. Even if you check the table before testing for level, the simple movement of the sand from the back of the stand (hopper) to the front of the stand (bucket) will be enough to through it out of level substantially, especially if being tested on carpet. Better off using 2 different stands, with the load centered in both if possible.
Creative and frugal builder's should be able to build a hopper for less than $100 (not counting the testing table). I have even built some of these with collapsible legs that fold in on itself, allowing it to be transported in the trunk of a car. PM me if you have questions or need pics.
Dan Holdgreve
Northmont Science Olympiad
Dedicated to the Memory of Len Joeris
"For the betterment of Science"
Northmont Science Olympiad
Dedicated to the Memory of Len Joeris
"For the betterment of Science"
Who is online
Users browsing this forum: No registered users and 0 guests